Friday, April 29, 2011

Hoppy Birthday Banner


Materials:
  • card stock in your choice of colours (2-4 colours)
  • letters (stickers, scrapbooking or cut your own)
  • ribbon
  • glue stick
  • pencil and ruler
  • scissors
I used pre-cut card stock for this project, which makes it easier and faster than a circular garland. I bought a package of pre-cut cardstock in four colours at the dollarstore. Each piece is 61/2 inches by 41/2 inches.
First decide on what you want the banner to say, as well as any additional decorative pieces. Lay out your pieces so you can see how it looks before you start. Once you are happy with the colours combinations, cut our all your letters I used a combination of white, off-white and two shades of  brown. I drew the letters freehand, but feel free to use a template or pre-cut scrapbooking letters or stickers. Lots of options available at dollar and craftstores. Once you like what you see, glue on your letters and embellishments-lining them up all the bottom edge will help it look even.


I added a silhouette of a bunny wearing a party hat to each end of the "hoppy" banner. I cut out the bunny, the triangle and the pom pom from paper and drew the details with a pencil.


Next I made a "pocket" for the ribbon by measuring out an one inch fold and gluing it to the back side. I applied just a thin strip of glue-don't glue the pocket shut. Think of a curtain panel, the ribbon will be like the rod. I used the side of the glue stick to get a very thin line.

Once all the glue is dry, slide your ribbon through each letter, making sure the letters spell out the word correctly and knot the ribbon on each side. I did the banner this way because I wanted to be able to re-use parts of it. I can keep the "birthday" as is, and take out the bunnies and the "o" from "hoppy" to change it to a standard birthday banner instead. Just un-tie the knot and slip off the letters.

It's actually really easy to make a custom banner, they look great and can be customized. Much better than the tin foil ones at party stores. For the instructions on how to make a circular banner, check out the "sweet pea" banner here

 
I am thinking about making some felt garlands and pennant banners, they'll be longer lasting and can be used in various ways for lots of different kinds of events.

Thursday, April 28, 2011

Hoppy Birthday Party

Date: Sunday April 24, 2011 (Easter Sunday)
Location: Mississauga, ON
Guests: 10
Budget: $75


 Menu:
  •  Crackers and Cheese platter
  • Thai Chicken bites with Sweet Chili dipping sauce
  • Veggie Platter
  • Mini Samosas
  • Fruit platter
  • Strawberry and cream trifle
I made all the platters myself. Prepared veggies, fruit and cheese trays are so expensive. If you have the time, it is well worth it to make it yourself. My only suggestion is to buy the fruit ahead of time, so it has time to ripen. Which I didn't do-thus no melon. The cheese I got was on sale, as well as the grapes and strawberries. The samosas are pre-made, but were a good price and baked rather than fried. For the chicken bites, I simply baked the chicken breasts in the oven, sliced into cubes to be eaten with toothpicks. Now that I think about it, no one even used a plate! So I didn't have to wash dishes. Bonus!
The spread: it's it so colorful?
    Mini Samosas: very yummy. Next time I will add a yogurt dipping sauce
    Maple Leaf Prime Thai Chicken, comes with the sauce. I had a coupon for $2 off.
      
    Grapes, strawberries and pineapple. No melon, they weren't ripe.

    Old Cheddar, Goat Cheese with herbs, Marble, Havarti

    Various peppers, celery, cucumbers, grape tomatoes

    Trifle: angel cake, whipped cream and strawberries
     The trifle was an accident-it was meant to be a strawberry shortcake inspired birthday cake. It fell apart when I added the second layer. It fell to pieces. Epic fail. In a panic, I called my sister, since it was Easter Sunday grocery stores were closed. She said "do you have a bowl? Make a trifle". Thank goodness. She also picked up a carrot cake from a small market that happened to be open, just to be safe. We could have gone without it, but I was worried about it. But it tasted great after all. Silly me, I failed to stick to the plan. A few weeks ago, I baked a test cake since it has been quite awhile since I actually baked a birthday cake. The test cake was great. Then I saw cake mix on sale for $1 and in my zeal to save money used the cake mix instead of my original recipe. Bad idea. The lesson-stick to the plan! 

    Decorations:
    • Hoppy Birthday Banner
    • Paper Streamers
    • Paper Bag Easter Baskets


     I made both the banner and the streamers from cardstock. The paper streamers are simple to make, you simply need a piece of paper, scissors and some tape to hang them up. You can find further instructions here. My original plan was to hang them all vertically from the ceiling, but I have stucco ceilings and they all fell down. So taped them to the wood shelf and in the doorways. It seems the theme of this post is "what went wrong", I don't want to give the impression that the party didn't go well because that is not the case at all. This just goes to show how things don't always go according to plan, it's good to have back-ups because you never know.

    Paper Bag Easter Baskets:
    These paper baskets are so easy to make, and look great. All you need are paper bags, scissors and some tape. The instructions on how to make these are here. I added a paper flower for the girls, and a bunny for the boys. Inside the baskets were bubbles, small toys and some chocolate eggs. The grass is green paper I shredded with a paper shredder. Easy, cheap and recyclable.


     Rosette hair pins:
    For each girl, I made a felt rosette hair pin. Simple to make. You can find the templates and instructions for free all over the internet. Find one you like, and go for it. It only takes a few minutes. As many of you know, felt is my favourite crafting material and this project is a great way to use up small scraps.


     Activities:
    • Dye Easter Eggs
    • Egg Hunt
    • Golden Egg Challenge
    Even though we are all adults (no kiddos yet) my sisters wanted to dye Easter Eggs. Some of the boys hadn't ever dyed eggs before, and they really got into it! We used both store bought kits, as well as food colouring and vinegar dye. The store kits did not work as well as the dye. And the smell! Ugh, so were awful. My favourite eggs are the ones we dyed with food colouring. We used dental floss, elastic bands, stickers and wax crayons for the patterns.


    Egg Hunt:
    I hid plastic eggs with candy inside all over my apartment, and outside on the balcony. It might sound silly, but it was really fun. I think I hid the eggs too well, I found an unfound egg the next morning.

    The Golden Egg Challenge:
    This was the birthday boy's idea. He wanted a game where the winner won a golden egg trophy. I found a "golden egg" aka a yellow glass blown egg on clearance at Home Sense for $4. The birthday boy invented the game, which consisted of knocking down a pyramid of plastic cups with a Nerf dart gun. The person who knocked the cups off the table with the fewest darts won the golden egg. The birthday boy won (of course). So he gets to keep the egg for a year, and is responsible for coming up with next year's challenge. We'll keep the tradition up from year to year, passing the egg around. Again, silly but fun.

    Tuesday, April 19, 2011

    Easter Birthday

    This year my husband's birthday falls on Easter weekend. My challenge is to organize a family party for 10 people, to celebrate both Easter and his birthday without Easter taking over. Here's what I am thinking so far.

    http://www.pingg.com/gallery/design/easter-egg-chickens

     Martha Stewart and Pingg have joined forces for a collection of free Easter E-cards and E-vites. I found this image-egg chickens celebrating a birthday! Perfect. So this led to the general idea of Easter characters-chicks, bunnies etc wearing party hats. I think it is a perfect way to combine the two themes.

    I am designing a "Hoppy Birthday" banner with bunnies, and am going to make paper bag easter basket "lootbags".  Something like this:

    http://www.marthastewart.com/article/basket-bouquet

    Quite easy to make, and inexpensive. Haven't decided exactly what will go in them yet, but I have a few ideas.....

    Birthday Boy wants to go to Swiss Chalet for dinner, and I am happy to oblige. With a small dining room and no dishwasher I do not mind at all. I'll serve up some appetizers, and of course birthday cake.

    I'll post more about the party later, once everything comes together.

    Easter Pussy Willow Arrangement

    Today's idea comes from my Swedish-Canadian friend who sent me this image of a pussy willow arrangment she made. In Sweden it is traditional to decorate branches-typically willow, birch or pussy willow with easter eggs, brightly coloured feathers and fuzzy yellow chicks to celebrate spring.
    She also told me a funny story about tramping through her neighbour's field searching for pussy willows in the recent spring snow storm we had on the weekend. The snow was actually blowing horizontally.


    This image is so Swedish to me-with the all white background, the brightly coloured decorations and table runner. I hope you find this image inspirational. For another take on the same theme, check out my version with willow branches, a bird and nest and butterflies.

    Friday, April 15, 2011

    Easter Eggs

    I've come across some very beautiful and interesting egg dying techniques this week, that use common things that are inexpensive. Did you know you can use fruits and vegetables to create dyes? If you want to eat your Easter eggs (I never actually do) natural dyes are great, no worries about possibly ingesting chemicals. I've been doing some research on common things that you can dye with. Add any of these ingredients to boiling hot water, the longer you simmer it, the stronger the dyes. Natural dyes take longer, it seems at least 30 mins, to up to 2 hours, so you have to be patient. Except for the onion skins, add a teaspoon or so of vinegar, it will help set the dye.
    • Yellow onion skins=rust orange
    • Red onion skins=purple
    • Tumeric=golden yellow
    • Coffee or tea=beige to brown, depending on how long it sits
    • Beets=red or pink
    • Red cabbage leaves=blue
    • Grape juice=purple
    Source: http://bigsislilsis.com/2010/04/02/natural-dye-colored-easter-eggs/

    I love these eggs, the rust colour is stunning. The designs are made with flowers and leaves. For information and the instructions on how to do this, check out it out here.

    Another tried and true method is to use hot water, food colouring and a teaspoon of vinegar per colour. It's much faster than natural dyes, and you can get really intense colours. Add drops of food colouring to small containers of water until you are happy with the shade. Then add two more. That should be about right.

    Source: http://www.marthastewart.com/how-to/marbelized-eggs#slide_6
     For an interesting marbled effect add some oil to the dye and swirl the eggs around.

    http://www.marthastewart.com/photogallery/egg-dyeing-101

     To add decoration and patterns, the easiest way to do it is with the wax resist dye method. Draw patterns with a white wax crayon. When you dye the eggs, the dye won't stick to the wax, that part will stay white.
    Use the mask method: Try wrapping the eggs with flat dental floss, rubber bands or strips of masking tape. Stickers are great to add words or shapes. If you want to do multiple colours, start with the lightest colour first and gradually add the darker colours. Keep in mind the rules of colour mixing-so you don't end up with grey, brown or muddy colours (unless that was on purpose).

    Red+Blue=Purple, Red+Yellow=Orange, Yellow+Blue=Green, But Purple+Orange+Green=Muddy Brown


    One last tip-keep the egg carton handy to allow the eggs to dry before handling. Use a spoon to lower the eggs in and out of the dye, so you don't get dye all over your hands.

    For more information and ideas, I suggest Martha Stewart's website-tons of inspiration.

    Be creative and have fun!

    Complimentary Anniversary Dinner & Show

    As part of our wedding package from the Living Arts Centre last May, we received a voucher for a complimentary dinner and show of our choice to celebrate our (upcoming) first anniversary. We picked the Just for Laughs Roadshow, which was Wednesday. After a delicious buffet dinner- the standout was the free range chicken breast-similar to what we served at the wedding. It had an excellent sauce-some sort of reduction, possibly with balsamic vinegar and white wine. We're going to experiment at home, see if we can recreate. The cheese platter and roasted veggies were fantastic-I enjoyed plenty of double cream brie.There was plenty more to choose from-soup, salads, main dishes including prime rib and salmon. A laden dessert buffet, etc.


    After we finished stuffing ourselves-the waitress (who also served at our wedding) brought us this platter-cake and complimentary champagne. Of course since I was going to a theater, I didn't have my camera with me, so I took this with my cell phone.

    Stage before the show, of course no pictures allowed during the performances.
    After dinner, we headed over to Hammerson Hall for the Just For Laughs show. Four comedians, both Canadian and American. The comedian from Idaho was the best-really hilarious. The others ranged from good to just ok. I was surprised on how packed the theatre was for a Wednesday night, it seats 900 and it was almost full.

    We realized during dinner, that in all the reviews we read about wedding at the LAC, no one ever mentioned their anniversary package. We found the entire experience from initial planning, the actual event to the follow through to be excellent. The staff are pleasant to work with, the atmosphere is laid back but classy at the same time. During intermission we revisited some of the spots where we took wedding pictures, and had fun reminiscing about it all. Can't believe how fast the time has gone since then. It seems like just yesterday.

    Wednesday, April 13, 2011

    Spring Shopping Spree

    This past weekend I did the Winners tour with my oldest sister and scored some pretty sweet deals. Now that spring is here, it's time for colour!


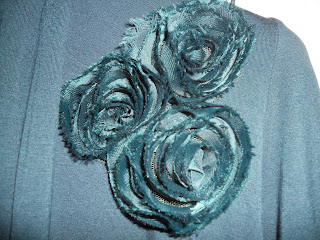
    Here's what I scored: a dark teal open front cardigan with rosette appliques, on clearance for $15. Can't really see it in the image, it's the blob on the upper left of the photo.
    A fantastic purple Sparrow True handbag marked down to $29 from $59.99.
    A scrapbook for $10 and a kirigami craft kit for $5.99.
    Pretty sweet deals, huh?  As soon as I got home, I switched from my brown suede handbag to the purple one. Love coloured handbags in the spring/summer. I have been intending to do a scrapbook of vacation photos from Mexico and Cuba and have not found the right cover yet, but this one is perfect. Can't beat the price either. It's a 12x12 format, and I already have tons of scrapbooking paper and doodads.


    Here are better images of the cardigan. The colour is a bit off in the photo, but it's close enough. I love the versatility-it can be worn open, tied to the side, or tied in the front. It's casual enough for jeans and ballet flats, or can be dressed up with dress pants and heels. Just because something is on sale, doesn't mean it is always are great deal. I always think about care-it is machine washable, will it wrinkle? And if  I can think of three other things I can wear it with, and at least two places I can wear it to, then I will get it. If not, I don't buy it even if I love it. Otherwise I won't end up wearing it.


     The kirigami kit is really cool, I'd never heard of it before.  Kirigami is related to origami, the Japanese art of folding paper but Kirigami uses cuts as well as folds to create intricate and beautiful designs. The kit includes the instruction booklet, a folding guide, tracing paper, a slew of coloured papers and scissors. All for $6, can't beat that for value. And since I recently broke the handle of my favourite craft scissors, it was too perfect to pass up.

    Some of the designs-aren't they neat?

    The project guide includes awesome tips and ideas. Both for home decor and entertaining. Here are some of the pages:


    I am going to use the designs in my new scrapbook-the tropical floral designs will be the perfect complement to my Mexico images. I also love the photo matte-I'll try that one too. There are so many uses-to add pizazz to basic white dinner ware, string them together for garland. There are a few three dimensional projects too, one is a hanging decoration/mobile, as well as the paper butterflies shown on the cover. Can't wait to start folding and snipping away.

    I always start at Winners first when shopping, especially for gifts. I can always find something fantastic at a great price. I suggest going with a friend, filling a cart and trying everything on. You never know until you try it. Rummage through the stationary and home section too, good deals abound.

    Happy Shopping!

    Tuesday, April 12, 2011

    Student Employee Appreciation Party


    Date: Friday April 8, 2011 3-5 pm
    Location: Blind Duck Pub, Mississauga ON
    Guests: 50
    Budget: $500
    *to protect the privacy of the guests, no photos of guests will be shown. This makes for very boring pictures, so I apologize. 

    Not much going on here, it's a pub after all.....
     Menu:
    • Mozzarella sticks
    • Onion rings
    • Jalapeno poppers
    • Sweet Potato Fries
    • Chicken wings
    • Chicken tenders
    • Tempura
    • Unlimited fountain pop
    Games and Entertainment:

    • Unlimited use of pool tables
    • Photo booth
    • Alphabet game
    • Raffle-draw for $50 gift card

    Alphabet game:
    This game is really easy and requires very little in the way of preparation. All you need is a paper and pen/pencil. The idea is to split up the guests into groups (or indivudally for small groups). The object of the game is find an object that starts with each letter of the alphabet, using only what you have with you-what you are wearing, in your pockets, purses, bags, etc. The first team (or person) with the fastest complete list wins!
    Whenever I play this game, I am always delighted at the creativity of the answers!

    Photobooth:


    I set up a photobooth on this curved glass wall here, it's away from the main traffic area. I use a roll of white paper, and taped up three long sheets to serve as the background.  I debated for some time over what exactly the background should be- coloured, patterned, a scene of some kind, etc. In the end I went with white to allow the props to really stand out. I made two  frames out of cardboard and painted them silver. In retrospect, I should have picked up a few frames from the thrift store. After awhile, the cardboard lost it's shape, and we abandoned the frames. I also think a dark frame-brown or black is better than metallic silver, the flash bounces off the shiny paint.

    I provided a whole range of fun props-cowboy hat, fedora, scarves, gloves, feather boa, tiara, masks etc.

    Some of the props-I had many more too! The masks, boa and bunny ears were the favourites.

    I brought my compact HP Photosmart printer, and set up a print station to print out the photos for the guests to take home as a souvenir. I brought two memory cards and an assistant printed from one card while I continued to take pictures with the other. This is really important to keep the flow of guests going to make sure everyone has a chance to visit the booth and to have the prints ready before the end of the party. Each print job takes about 1.5 minutes, not including time spent choosing and editing the images.

    Image source: http://reviews.cnet.com/compact-photo-printers/hp-photosmart-a636/4505-13252_7-33190854.html


    This is the printer I have, HP Photosmart A636. Lot of questions at the party-where to buy it, how it's works, how much it costs, etc.  The printer itself is not very expensive, I got it at Staples for about $80, and I have seen it on sale for around $60-$70. It prints directly from a memory card or usb stick, and even has bluetooth to connect to smartphones. The paper is a bit pricey-I buy it at Walmart or Staples. Staples occasionally has a sale buy one get one free for about $17 for a 100 pack so when there is a sale I stock up. The printer can do either 4x6 or 5x7. The toner is about $29 or so, Walmart is the cheapest source. You can get about 50 prints per cartridge. So each sheet print work out to about 64 cents each. Not the cheapest way to print photos, but certainly the most convenient. You may remember this printer from the guest book/scrapbook I set up at my wedding last May. Here is the link to that post.


    Here's one of me! You can see how the frame lost it's shape

    All in all, the guests has a great time and I received many compliments from guests on their way out. High praise for the activities.
    Another sucessful event!

    Friday, April 8, 2011

    Party Ideas and Recipes Source

    A friend of mine forwarded me a link to this site this morning: Life Made Delcious. What a wealth of tips, ideas, recipes and free downloadable printables.

    http://www.lifemadedelicious.ca/

    Just some examples:
    • Easter recipes and crafts
    • Free invtations, cupcake wrappers and toppers
    • Party ideas-pirate, disco, beach etc.
    I really love the polka dot cupcake wrappers (found with the Royal Wedding Party Kit).