Showing posts with label children. Show all posts

Friday, October 7, 2011

Transformers 8th Birthday Party

Date: Sunday, October 2, 2011
Location: Rinx, 65 Orfus Rd, North York, ON
Guests: 12 children (ages 4-8), 10 adults
Budget: less than $500
Theme: Transformers

* Photos of actual guests are included in this post, but faces are not clearly visible.

Rinx is a huge entertainment complex featuring an ice rink, a roller rink, glow in the dark mini putt, 10 pin bowling, mini bowling, laser tag, and other games. Various party packages are available, at varying costs.
The Silver party package includes: invitations, 2 activities, a party room, a party coordinator on site,  pizza and pop and all plates, cups, napkins, etc, and a t-shirt for the birthday child.

Decorations:


To be honest, I found the party rooms at Rinx to be shabby, very worn down. There wasn't much that could be done to improve the decor quickly. When the staff said everything was included, I had expected them to provide tablecloths, which they did not.  In retrospect, I should have brought some myself. Oh well, the kids didn't mind. I blew up some over sized balloons, and hung up a Transformer's poster of Bumblebee. When the birthday boy saw it, he asked if we were playing pin the tail on Bumblebee. I laughed, but then I thought, we could have played a version with the transformers logo. Oh well, file that idea away for next time.


Guest Favours:
I created the lootbags by printing out a large Transformers logo and adhering it to the gift bags with double sided tape. I chose a red logo over a black, for a more colourful effect.
They turned out really well, and the kids were impressed.


 Inside the bags were various small items from the dollarstore, including a bouncy ball, glow in the dark bracelets (we wore them during bowling), a transformer's candy dispenser,stickers, and these really cool aliens. They are my favourite item. I actually had a hard time finding affordable Transformers items, so I stretched it a bit to include aliens, since Transformers really are a kind of alien.


Aren't these cool? Love the eyes.


Activities:


The birthday boy chose Laser Tag, and I chose mini bowling after some discussion with party staff about appropriate activities for the ages of the guests.


Since, everything is glow in the dark, the lighting conditions were not optimal for pictures.
I have a few, but most are blurry streaks.

Laser Tag was the first activity of the afternoon, the on site staff helped the kids get into their vests, and explained how to play. This activity was a bit daunting for some, but most got right into the game. Two adults volunteered to play with the kids, and I stayed close by to keep an on things. A few children got scared, and wanted out. I entertained them with bubbles and balloons in the hallway. A few 6 years olds loved it, and some 8 olds were scared, so it really depends on the personality of the child, but I would say 8 would be the minimum age for this activity.


Mini Bowling turned out to be the highlight of the afternoon. We had the whole room to ourselves, the lanes are about half the size of 10 pin lanes, and the kids used a 5 pin sized ball. It was perfect for them.

Even the 4 year old could knock down the pins!


Now that the kids had really worked up an appetite, we headed back to the party room for lunch. Pizza and pop was included in the package. I also brought a fruit and a veggie tray, popcorn, chips and salsa, and cupcakes.
The pizza was delicious, and is made in house at Rinx.


The Transformers cupcakes turned out great, and they tasted delicious. Two flavours, chocolate and vanilla, decorated with some of the well known characters.  The cupcakes are from the Cupcake Shop
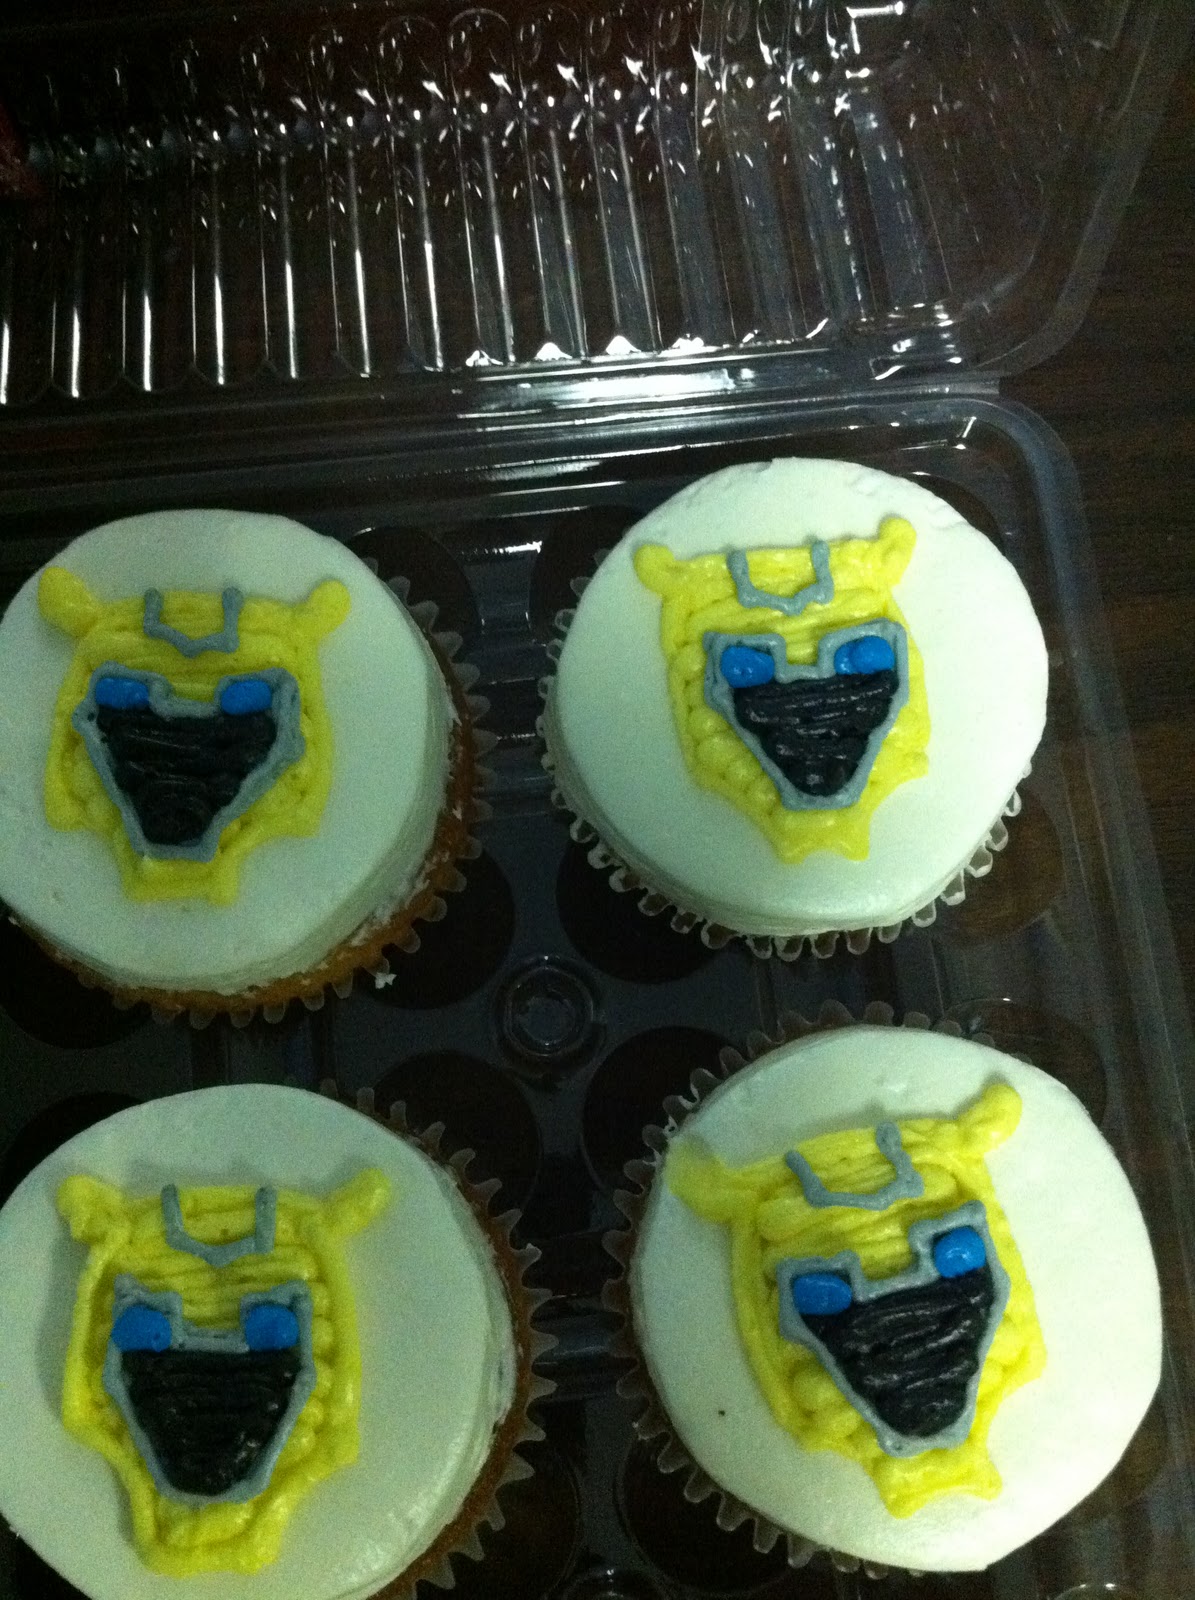
 Bumblebee

 Optimus Prime

Soundwave

Overall, the kids really enjoyed themselves. One boy exclaimed "this is the best birthday party ever!"
And that's what it's all about at the end of the day.


Tuesday, June 14, 2011

Toy Story 4th Birthday Party

Date: June 4, 2011
Location: Mississauga, ON
Guests: 17 children (age range 1-8) plus about 30 adults
Budget: $40 (not including food)

*To protect privacy, no photos of guests are included in this post. 

This party was intended to be held outdoors in Erindale Park. Major thunderstorms forced a last minute change of plans-party was held at the client's house. While not ideal, I did manage to salvage most of the party plans. It cleared up in the afternoon, I was able to take the kids outside for a few games.

Concept: Woody's Round-Up.
Four stations with various activities, at each station the children received a prize.

Upon arrival, each guest received a cowboy party hat and a sheriff badge. 


I put out crayons and colouring sheets for the kids to do while we waited for all the guests to arrive.


Free download from the Disney website, you can find it here


Station #1: Mr. Potato Head

 
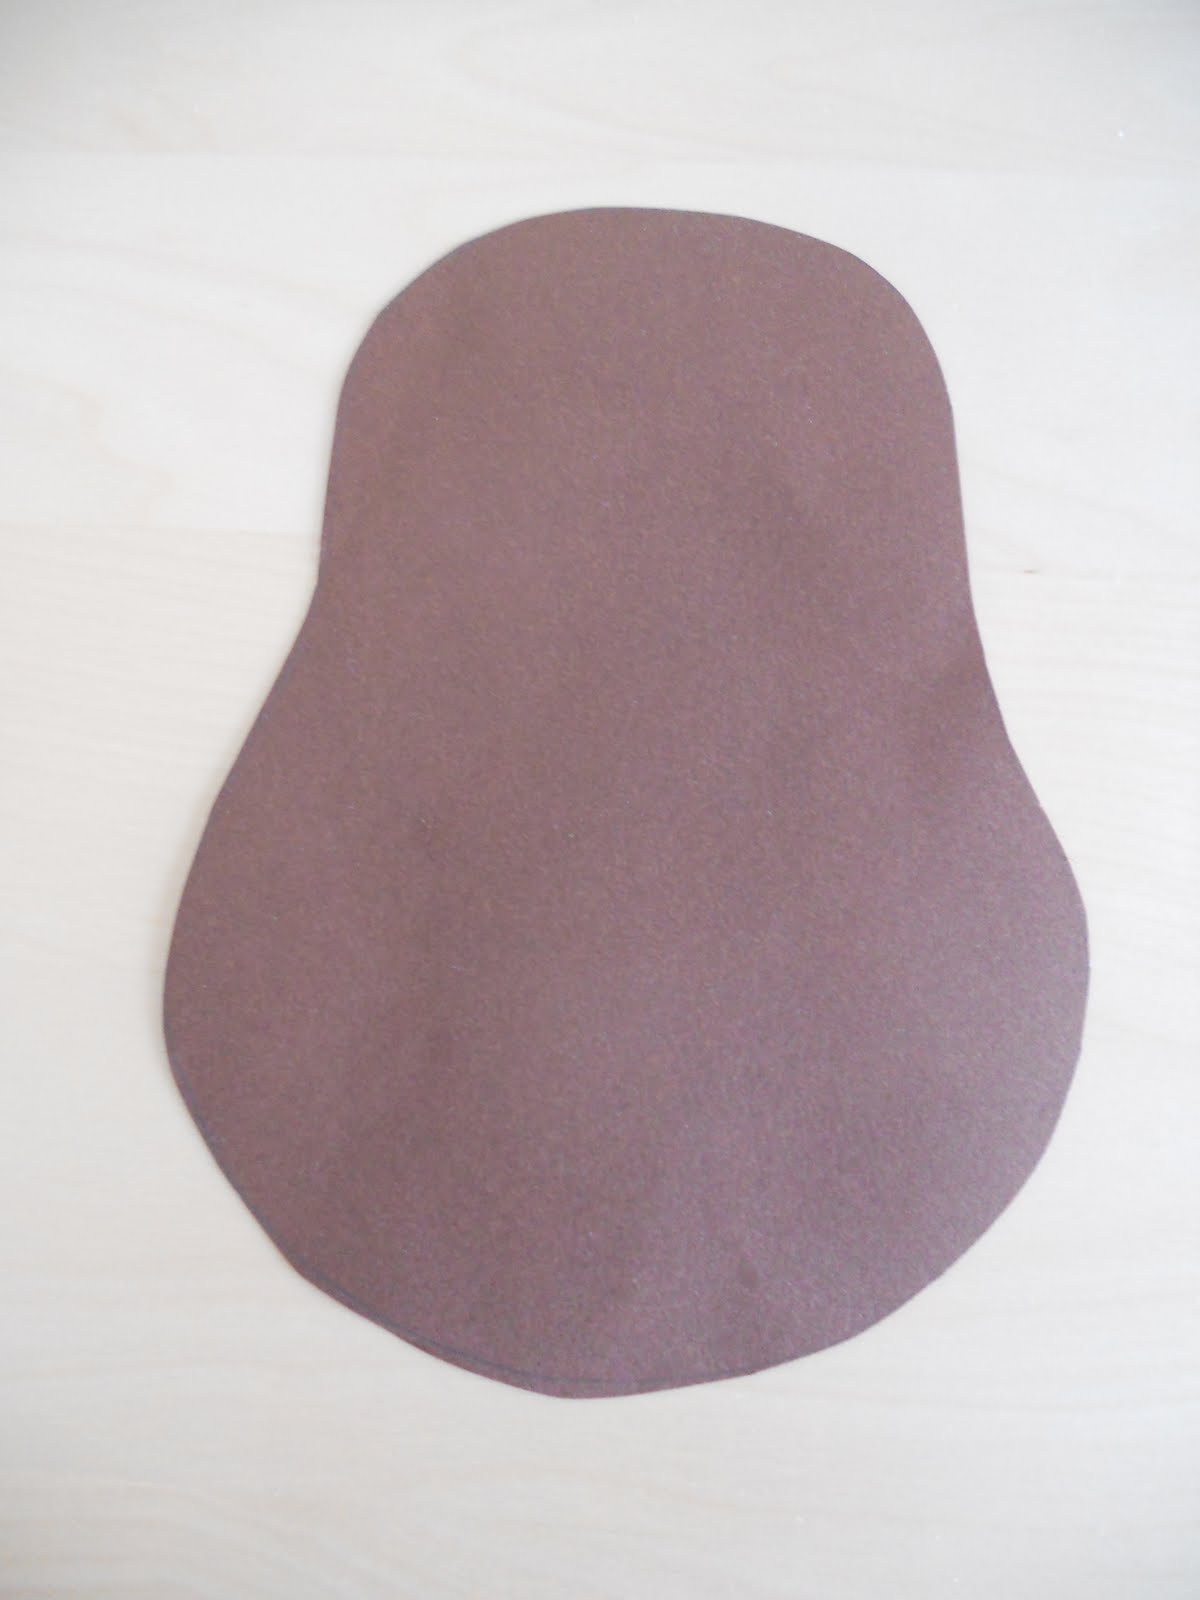
For this station, I cut out a potato shape from brown cardstock for each child and provided them with a variety of features to choose from, including shoes, hat, arms, noses, mouths etc to glue onto the background shape with a gluestick. Obviously,  younger children might need help with this activity. Each guest can take home their creation at the end of the party.
Variation: Print out the shapes onto sticker paper.
I didn't do this since the adhesive paper is quite expensive.


The link to download the features can be found here
Template for the body can be found here I found the body to be too large for the features so I reduced it on the photocopier to 70% before cutting out the template.
It could have been a bit smaller.


 Image source: http://twilightsummer.deviantart.com/art/ToyStory-Woody-110822912

Station #2: Woody's Shoot-out
Knock down a pyramid of plastic cups with a water pistol. This activity should be done outside, we played this game on the front lawn. It was little too difficult for the younger children. The older boys had a great time, they asked to do it again and again.I was so involved with running the games, I forgot to take pictures.
You'll have to use your imagination.

Image source: http://www.allposters.com/-sp/Toy-Story-Buzz-Lightyear-Posters_i5239758_.htm

Station #3: Space Ranger's Training

The hunt for moon rocks.


Sort of looks like a rock, you get the idea. The moon rocks were hidden throughout the front and side yards for the children to hunt down. Sort of a space themed easter egg hunt, if you will.
Prizes inside were small toys like parachute army men, bouncy balls, toy story note pads and silly bands.

Image source: http://www.thetoyshop.com

Station #4: Jesse's Lasso Challenge
This game involved "lassoing" a toy cow. I thought using rope might be a tad dangerous with small children around (think choking) so we used frisbees with holes in them, sort of like ring toss.

Decorations:
In addition to the usual streamers and balloons, I made this centrepiece from a box, paper and templates from the Disney website. Lots of free templates, crafts, etc can be found there, with all sorts of characters.


The aliens are easy to put together, Woody and Buzz are more challenging. Prepare yourself for lots of cutting and gluing. Since this is paper, it's not exactly the most kid friendly thing. All the kids wanted to play with it. Looks cool though. And since it's just paper and glue, it's practically free. Woody is technically a marionette, but I cheated by mounting him on a skewer instead of hanging him. I covered the box with blue paper and cut out white clouds that sort of look like the wallpaper in Andy's room. Each little character has toothpicks taped to the inside. I drilled holes in the box with my cordless drill and inserted the toothpicks. As I said before-toothpicks are not appropriate for young children. This was meant purely for decoration-but of course all the kids wanted to play with it. I had to explain over and over that it was only made of paper!

This party was not without it's challenges-rain, last minute change of venue, wet grass and mud, and a small space. I must admit-I was exhausted after this party! 


Wednesday, June 8, 2011

Woodland Fairy Party

I saw this party theme idea in the May edition of Paren'ts magazine. In fact, there were lots more of great ideas, all under $100. But this particular one struck a cord with me. I actually saw faux wood grain wrapping paper at the AGO giftshop for 99 cents, but wasn't sure what I would use it for. Now I know!

Isn't the cupcake stand fantastic? Love it.

 Image source: http://www.parents.com

Toadstool cupcakes? Easy and so cute.  I like the use of two different sizes.

 Image source: http://www.parents.com


Image source: http://www.parents.com

I found wings online for $4-$5 a pair.Oriental Trading Company has some monarch butterfly wings, they look pretty awesome. Link is here

I'm sure party packagers and some dollarstores also have them.
The headband and hat are made from paper. 


This theme reminds me of a Midsummer's Night Dream.Older children could dress up and act out scenes from the play. This is a blue sheet with white clouds attached to serve as a photobooth, but could also be the backdrop for the stage.
 Image source: http://www.parents.com

I have the photo printer already to print out the pics, kids can make the frame to take home as a favour.

See the website here for more details and instructions. Lots more themes for both girls and boys of all ages and price ranges.

Friday, June 3, 2011

Lady Bug Decorations

A friend asked to help her with some things for her daughter's first birthday. I didn't have alot of time to contribute, but I came up with these two quick projects.

 Directional Signs

The idea for these guys were to be signs to point the guests to the party, without giving away to much information such as the address or child's name. Guests were told to look for the ladybugs. One was at the entrance to the complex, one each on the front and back door. I made them from cardboard and acrylic paint. I painted them freehand, so they are not all perfect, but since they would not be side by side, it didn't matter. They are quite sizable, I used the lid from a paper box. Easily seen from a distance. I think the middle one is my favourite.

Leaf cupcake flags
These little guys are so easy to make and look adorable. 
Materials:
  • toothpicks
  • green paper
  • red dot stickers
  • black marker
  • glue stick


 Cut out a leaf shape from green paper.

 Add some red dots (the body of the lady bug)

 Draw on the details with black marker.

Add a bit of glue and roll the stem of the leaf around the toothpick.

Of course, try not to touch the pointy end of the toothpick, or wear gloves. It's easy to whip up alot of these in a very short period time. I made a dozen in about fifteen minutes.
If you are considering a theme for a young child's party, especially if that party is in a backyard or park I encourage you to use a ladybug theme. There is so much available online-free printables, games, activities etc. If you can't find ladybug decorations, they are easy to make. Or simply use red/black/green as your colour scheme.

Wednesday, May 18, 2011

Green Parties & Weddings

Image source: http://www.greenlivingonline.com

Here's a great source for tips to green up your next party or weddding: Green Living Online
Sign up for newsletters sent to your email inbox for great tips.

Some great suggestions to help make events more ecofriendly:
  • use biodegradable plates and utensils (usually made from corn)
  • look for 100% recycled paper products and make sure to recycle/compost them
  • green up your lootbags/guest favours-use a re-usable, biodegradable bag or container
The site also lists suggestions for loot bag filler such as organic lollipops or candy, smencils (smelly pencil crayons made from recycled newspaper), small toys from Plan Toys. For the container itself, here are some ideas I like-a cloth lunch bag, a pencil case, a sand bucket, a photo box/keepsake box. Try to find something that can be re-purposed.

I find ecofriendly toys to be a bit expensive, so pick one or two really great items.

For weddings: there are tips on every category from the ring to the honeymoon. You can find the wedding article here 
My suggestions:
  • serve organic, free range or local menu items
  • use items for centerpieces that can be re-used or re purposed
  • use flowers that are in season
  • buy a second hand dress, one from a charity shop or at least re-sell yours when you are done
  • consider renting dresses (brides or bridesmaids)
  • look for guest favours that are practical, organic or donate to a charity in your guest's name
  • consider paring down your guest list-reduce your carbon footprint and save money at the same time
Hope you find these tips helpful, check out Green Living for more great suggestions.

Monday, May 16, 2011

Re-Post: Cake Pops

Just the other day I was eying some cake pops in the display case at Starbucks wondering how difficult/easy they are to make. Then I came across this tutorial


Image source: http://aubreyandlindsay.blogspot.com/
 
TimBits! Of course- the perfect size. You can buy the sticks and sprinkles at Bulk Barn. TimBits aren't too pricey, you can get 20 for $1.99 and if it saves loads of time and stress, then it's worth it to me. I am thinking about dipping the donuts in melted white and dark chocolate rather the icing-I don't want them to be super sweet.  I like them as an alternative to cupcakes at birthday parties. If I use timbits, I can offer flavour choices-plain, sour cream, chocolate, etc. I'll have to try it out and see how they go.

http://aubreyandlindsay.blogspot.com/2011/05/5-minute-cake-pop.html

Thursday, May 5, 2011

Growing Reptile Egg

This post is a bit silly, but kind of fun. I had an extra "growing reptile egg" leftover from some lootbags, and I thought it might be fun to take pictures of the process. The instructions are to put the egg in a container of water- the reptile will slowly hatch out of the egg, to fully emerge in about 48 hours.

Day 1: 1 pm
Day 1: 10 pm. Starting to crack a bit.

Day 2: 10 am

Day 2: 10 pm

Day 3: 10 am

Day 3: 9 pm I removed the shell at this point.

Day 4: 9 am.  Fully grown.
The package says you can move the reptile to a bigger container, and it will grow to fit the size. I tried this, but saw no difference in size. The alligator ended up palm sized, about 3 inches in length. I did find it was slimy, I washed it off. The whole process is actually quite fun (for me anyway), not bad for a $1.25 toy.