Monday, December 19, 2011

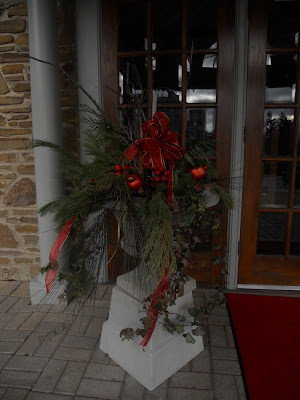
Corporate Holiday Party-Glenerin Inn


Date: Friday, December 16, 2011
Location: The Glenerin Inn, Mississauga, ON
Guests: 32 adults
Budget: >$30 per person

Menu: 
Yuletide Buffet:
Wide variety of soups, salads, side dishes, entreés, carving station (turkey and ham), stuffing, cranberry sauce, condiments, fresh fruit, assorted desserts. The coleslaw was some of the best I've ever had.
The cheesecake and chocolate mousse cake was unbelievably delicious .It was all good, really!

 Dessert Table

 Decorations: All centrepieces and decorations provided by the Inn, included in the rental fee. Rental fee varies depending on the size of group. I booked the Evans Room, it was a perfect fit.

 The Evans Room


Evans Room had it's own tree


 Lobby Tree

Lobby Fireplace


Entertainment:

I printed out some index cards with holiday themed riddles, brain teasers and trivia. I downloaded the index card template for free from the Microsoft website. The content came from various sites-just google "Christmas riddles" and you will find plenty. I put the answers on the bottom of each card in smaller font, and rotated it upside down. Print out on card stock, and cut out each card.
I put some on each table for guests to quiz each other.  Once a table had finished their stack, I encouraged them to trade with their neighbours.

Gift exchange game (optional):
I asked the guests beforehand to bring a wrapped gift valued no more than $10. After dessert, I asked all guests to pick up the gift they had brought, and form a circle. A guest volunteered to read out the poem "Twas the Night Before Christmas"-when you hear the word "right" pass the gift to the person to your right, left passes to the left. If done correctly, no one should end up with their own gift. You can find the poem here

Much laughter ensued. Some guests traded amongst theme selves afterwards. This is a really great game if you are short on time-it only takes about 10 minutes or so.


I can't praise the Glenerin Inn enough for the fantastic experience.  The staff is so wonderful, the atmosphere elegant yet cozy at the same time. The food scrumptious. Free neck and shoulder massages in the lobby!
Turn key service-I hardly had to do a thing, it was definitely the easiest party I have ever coordinated. I felt so relaxed that day-no running around, everything was seamless.


I would recommend the Inn again for a corporate event in a heart beat.
Weddings are also available.
For more information, visit their website

Monday, December 5, 2011

Re-post: Wrapping paper photo frames

Do you have scraps of wrapping paper too nice to recycle?
Upcycle them into these pretty photo matts.


 Image source: http://www.chatelaine.com

I love this project from Chatelaine. Really easy, and lots of impact. My favourite kind of project. You can find the details here 

It doesn't have to be just Christmas paper, use any paper at all. Metallic paper for black and white wedding photos, birthday paper, floral, graphic. I can think of some many iterations.

Lovely idea for an inexpensive gift, for Christmas or anytime!

Endorse Re-gifting

Are you are re-gifter?

Brain Pickings introduced tools to help reduce the stigma and guilt surrounding re-gifting. Free icons and graphics are available here
Licensed under Creative Commons, they are free to use, download, re-mix, etc.

Make gift wrap, note cards, post it on your facebook and twitter. Let people know you are ok with re-gifting.
Personally,I always try to include a gift receipt if I can. I am not offended when someone re-gifts something I gave them. I'd rather it was used, then go to waste. Not your taste/colour/size? Pass it on!

Tuesday, November 22, 2011

Re-post: Party Decor All Year Round

I have boxes, drawers and bags full of random odds and ends left over from parties. It can be difficult to figure out what to do with all these things, and I hate to throw things away-although I do donate things to charity a few times a year. This article from Apartment Therapy lists party items that can be re purposed.
I am loving the succulent wreath, the CB2 glass globe candle holder and the birch tree jewelery stand.


I've been doing lots of theme parties lately, and this inspires me to rethink re purposing common household items when decorating for parties, rather than buying new things all the time.

Click here for the link to the full post:

 Succulent Wreath, Viva Terra


Little Birch Jewelry Stand, Urban Outfitters

Whirly Hanging Candleholder, Cb2

 Images source: http://www.apartmenttherapy.com

Tuesday, November 1, 2011

Zombieland Halloween Party

Date: Saturday, October 29, 2011
Location: Mississauga, ON
Guests: Teenage Boys, 13-16
Budget: $100
Menu: Brains!

Almost all of the supplies and decorations for this party are from Dollarama, with a few exceptions that came from Party Packagers. The stuff from the Dollarstore is actually better! This theme is actually pretty easy to throw together. The "set" is real life with a gruesome twist. Set things up in unexpected places to surprise your guests. Play some creepy sound effects and music. Don't forget bugs, such as roaches and maggots to add realism.

This party is based on the movie "Zombieland", I used Columbus' rules as inspiration.Obviously, I didn't use all 32 rules, so pick and choose your favourites.


The Front Yard


The Front Door


Foyer


The Patio Door


Living Room Fireplace


 The Powder Room

Beverages
 
Appetizers

The Main Course


Dessert


I found a brain gelatin mold at Party Packages, and the recipe here

I used peach gelatin powder, it results in the most realistic flesh colour. The blood is corn syrup and red food colouring.

Zombie hunters were served pizza, chips and other snacks. After all, tracking down the Walking Dead is hard work! 

Sunday, October 30, 2011

From the Archive: Clown Fish Pumpkin


This post is a re-post from last Halloween. I entered this Pumpkin into a carving contest. 
It didn't win! Can you believe it?


From this...


To this!


Materials:
  • pumpkin, preferably medium sized and fairly round
  • cereal boxes or other thin cardboard
  • bamboo skewers
  • craft glue
  • scotch tape
  • craft paint: orange, black and white
  • permanent black marker
  • dark and light blue tissue paper
  • white card stock or bristol board
Step one:
Wash and dry the pumpkin. Once it is thoroughly dry, figure out which side is the face. On the opposite side (the tail) draw a circle with black marker. Draw some stripes on each side. Draw two eyes and a mouth, The eyes look best oversized. Then draw a large circle around the entire face.

Step two:
Fill in the black stripes with white paint. Fill in the eyes and the mouth. Two or three coats will be needed. One the eyes are dry, paint in the pupils.

Close up shot of the face

Step three:
While the paint is drying, draw out the shapes for the two sides fins and the tail. I based the size of the fins on the size of the pumpkin. Took a bit of trial and error until I was happy with the shape of the fins.


Make two drawings of each piece (the fins will be double sided). Paint all the pieces orange. When the base layer is dry, outline with black and add black lines, shown in the pictures. You will need one dorsal fin (the top), two side fins, and a tail. In this picture I also made some extra front fins, but I didn't end up using them.


Flip one half of each fin over. Tape bamboo skewers to the plain side. I used three skewers for the tail, and two skewers for each fin. Add some glue and sandwhich the two halves together. Let dry. Some touch ups of the black lines may be needed. The hard part is over! Assembly is easy, just stick the skewers into the flesh of the pumpkin. Touch up any areas as needed.

Side View
Back View

Optional:

To make the reef:
I used a lazy susan as the base, and wrapped it with dark blue tissue paper. Next I freehand drew the shapes of the coral on white card stock. Then outlined the shapes in black marker and cut out carefully with small scissors. Next I taped the coral shapes to the base, leaving gaps for the tail and fins. Next I layered the dark and light blue tissue, alternating the colours to make a "bed". I set the pumpkin on top, and it was ready to go!

Cinderella's Coach Pumpkin

This is an old project, from Halloween 2009-but I thought readers might be interested in another painted pumpkin project. My sister and I worked on this project together. For many hours. This was the first time either of us had decorated a pumpkin.


Materials:
  • Pumpkin
  • Knife to carve the pumpkin, spoon to clean out the inside
  • Pencil, pen, marker
  • Acrylic paint-light blue, silver
  • Paint brush
  • Glue gun and glue sticks
  • Toy horse
  • Satin ribbon ( I used white)
  • Doll or Figure ( I used a paper cut out)
  • Decorations
  • Candle or light (optional)
Step 1: Select the pumpkin. It has to be the right shape and size, preferably well balanced. Unblemished, if possible.

Step 2: Cut a lid into the top of the pumpkin, and scoop out the insides, the same as you would for any jack-o-lantern.


Step 3: Draw a door and windows as desired, and cut those out.
This is up to you, be creative.

Step 4: Paint the entire pumpkin, multiple coats will probably be needed. Once the base coat is dry, you can add details such as the silver veining I added.

Step 5: Once the paint is dry, add any embellishments you desire. I added some white satin ribbon as trim around the door, scrapbooking frames serves and windows. Use hot glue. I also glued feathers around the inside of the lid, and a crystal knob for embellishment. 


Step 6: Assembly. This the hardest part. Unfortunately I don't have photos of the support structure. Basically I found two "spokes" plastic things that looked like spokes and wheels. Painted them silver, and added spokes with black marker. Then I added a "web" of crisscrossed ribbons and sat the pumpkin on top. Lastly, I attached the horse to the wheels with more ribbon. It's hard to explain, and by all means experiment to see what works. It was alot of trial and error to get it sit right.


Lastly, I added a Cinderella paper doll to complete the effect.
If desired, add a candle or light to illuminate the pumpkin.

Happy Carving!