Friday, December 3, 2010

Corporate Christmas Decorations

I was asked by the head of a public building to decorate both the public spaces and the staff lounge with "seasonal" decorations. The stipulations were that they had to feature a white colour scheme, had to be non-denomational and nothing could be permanently affixed to any surface. Oh, and of course the whole thing had to be done on a budget.

The key points:
  • Main level reception desk
  • Main level public space
  • Fireplace seating area on the third level
  • Staff lounge on the fourth level

So! The first step was to gather everything the company had from storage and go through it all. The majority of it was horrible and 80's tacky. I did manage to re-use the following:
  • a 6 foot artificial tree
  • several artifical garlands
  • several yards of faux white pearl garland
  • white indoor lights
  • some lovely glass ball ornaments in blue, gold, white and clear with crystal embellisments
  • some vintage silver glass balls with wire stems

The client wanted some form of wreath, as long as it was white. I scored this beauty at Home Sense for about $65, not bad considering most were $85-$90. It's a very good size too, quite substantial. The client loves it, so I used the wreath at the inspiration point for the other decorations. Some of the key features of the wreath are pinecones, white poinsettias and roses, and assorted greenery. I hit up my favourite dollarstore and loaded up my cart.
I picked up:
  • white satin bows
  • lots of wired pinecones
  • assorted greenery
  • plenty of decorative floral accents
  • assorted tree decorations, including a plastic star topper

The wreath is hanging on the wall above the main reception desk. I picked up the heftiest 3m removable hook I could find so I could hang it on the wall without damaging the paint or drywall.

The next place I decided to utilize is a small half wall in the public area on the main level. I used small clear 3m hooks to hang some of the artificial garland. I added faux white poinsettias and white peonies, wired pinecones, some assorted faux greenery, the white satin bows and faux white pearl garland. Then I wired in the vintage silver balls I found here and there.


This picture is quite horrible, it was hard to get an overview shot. I do apologize. Here are some details shots:


The fireplace lounge on the third level is blessed with a very wide mantle. I simply laid the garland across, no need to attach anything. In this area, I added some gold accents. Again, I used white flowers-poinsettias, peonies and roses. The same wired pinecones, assorted greenery for texture and some decorative floral accents with gold here and there.


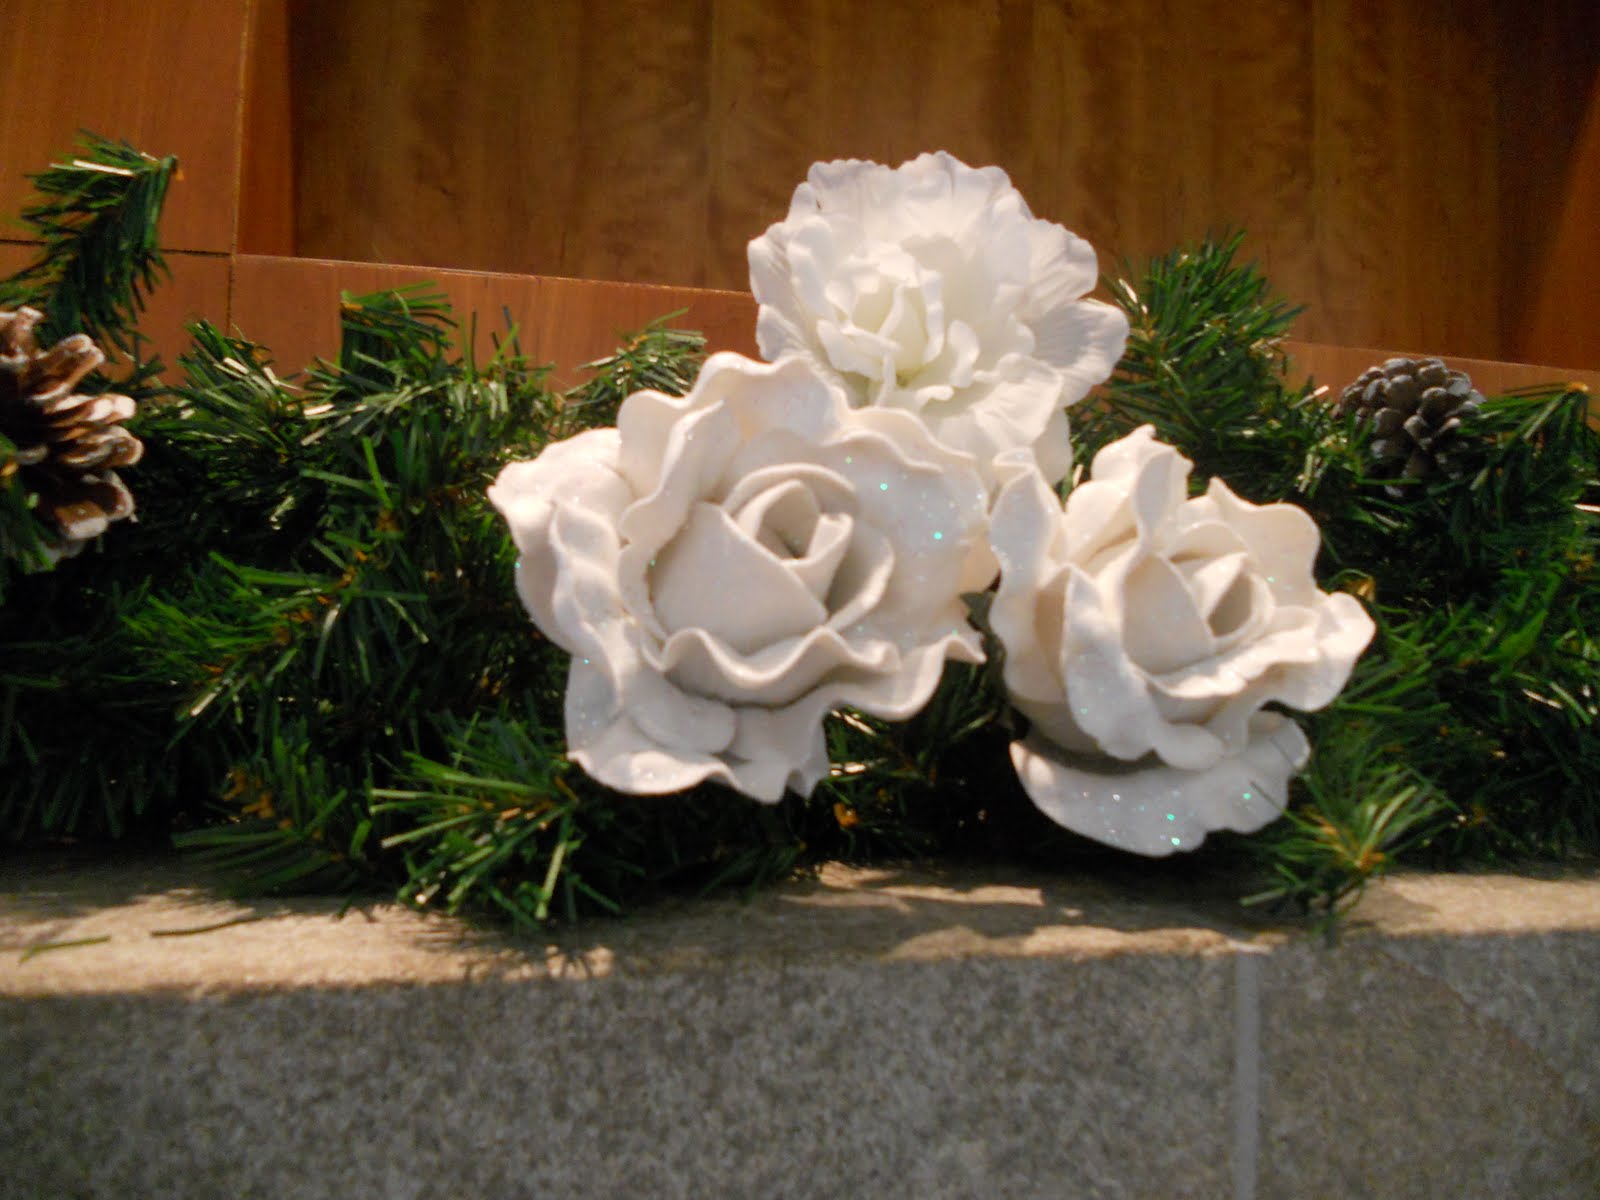
The natural tones of the pinecones and floral accents echo the wood surround quite nicely.

In the staff l0unge, I had a bit more freedom. The colour scheme of the room is tones of teal blue/green, you can see the colour on the accent wall behind the tree. I saved alot of the decorations they already had-the overall scheme is tones of blue, gold, and silver with crystal accents. I found an inexpensive white and silver felt tree skirt at walmart, as well as some inexpensive blue and silver ornaments. The tree itself is more yellow-green than spruce green, so that worked well with the tones of the room.


I had some crystal floral picks I originally intended to use for the fireplace, but I didn't like the way they looked. So-I snipped apart the bunch, cut off the floral wire and bent the wired end into a loop. Hanging on the tree, they look like icicles. Very pretty. A bunch of 5 cost $1, so really they are only 20 cents each. So affordable!


The entire cost came in under $150. Gotta love the dollarstore.

Thursday, November 11, 2010

Countdown to Christmas!


Six weeks to go! I've started an inspiration board on pinterest.com.
Check it out here

Enjoy!

P.S Time to start collecting pine cones and greenery now, before it gets too cold.

Wednesday, November 10, 2010

Craft idea: Wooden Shapes

I bought some unfinished wood shapes from the dollarstore. One package of flowers, and one of butterflies. 10 shapes for $1. Not bad. But what to do with them? Here are some fun and frugal ideas. They make great gifts and are simple enough for children to make. This can also be incorporated into a party, as both an activity to occupy guests and as a take home favour.


Fridge Magnets

Materials:
Unfinished wood shapes
Craft paint in assorted colours
Tray or palette for mixing colours (try an ice cube tray!)
Paint brushes, smaller are better
Adhesive craft magnets

Step one:
Lay down some newspaper, especially if you want to do this craft with children. Assemble the painting supplies and pick out which colours to use.


Step two:
Paint your wooden piece with a base coat. I found the paint soaked in, so two coats are usually needed. Don't forget to paint the edges! This is where it can get a bit messy.


Step three:
Once the base is try, it's time to add the details! This is the fun part. Use a small brush and take your time. Do darker colours first, then add the lighter colours. Let dry thoroughly.


Step four:
Once completely dry, flip your peice over and attach a small magnet. I used a roll of adhesive magnet and snipped off a small piece of maget for each shape. Ta da! That's it! Super easy, right?


So, what else can we do with these?

Gift Bags:
Glue a shape on to a plain gift bag. Bonus if you make a magnet first, and then tape it to the bag.


Ribbon garland:
Glue the shapes onto a ribbon for a fun garland. Great for parties. Why not a christmas themed one to decorate your tree or fireplace?


Mobile:
Carefully poke a hole into each shape with a large needle or awl. Hang the shapes from an embroidery hoop with string or fishing line. Hang some longer and some shorter, being careful to balance the weight so it hangs evenly. It would make a very inexpensive and customized mobile.

Christmas decorations:
Poke a hole into each, thread with metallic thread and hang on your tree. Use shapes such as stars and snowflakes.


Try it out! It's fun and cheap!


Tuesday, November 2, 2010

Clown Fish Pumpkin


From this...


To this!


Materials:
  • pumpkin, preferably medium sized and fairly round
  • cereal boxes or other thin cardboard
  • bamboo skewers
  • craft glue
  • scotch tape
  • craft paint: orange, black and white
  • permanent black marker
  • dark and light blue tissue paper
  • white card stock or bristol board
Step one:
Wash and dry the pumpkin. Once it is thoroughly dry, figure out which side is the face. On the opposite side (the tail) draw a circle with black marker. Draw some stripes on each side. Draw two eyes and a mouth, The eyes look best oversized. Then draw a large circle around the entire face.

Step two:
Fill in the black stripes with white paint. Fill in the eyes and the mouth. Two or three coats will be needed. One the eyes are dry, paint in the pupils.


Close up shot of the face

Step three:
While the paint is drying, draw out the shapes for the two sides fins and the tail. I based the size of the fins on the size of the pumpkin. Took a bit of trial and error until I was happy with the shape of the fins.


Make two drawings of each piece (the fins will be double sided). Paint all the pieces orange. When the base layer is dry, outline with black and add black lines, shown in the pictures. You will need one dorsal fin (the top), two side fins, and a tail. In this picture I also made some extra front fins, but I didn't end up using them.


Flip one half of each fin over. Tape bamboo skewers to the plain side. I used three skewers for the tail, and two skewers for each fin. Add some glue and sandwhich the two halves together. Let dry. Some touch ups of the black lines may be needed. The hard part is over! Assembly is easy, just stick the skewers into the flesh of the pumpkin. Touch up any areas as needed.


Side View

Back View

Optional:

To make the reef:
I used a lazy susan as the base, and wrapped it with dark blue tissue paper. Next I freehand drew the shapes of the coral on white card stock. Then outlined the shapes in black marker and cut out carefully with small scissors. Next I taped the coral shapes to the base, leaving gaps for the tail and fins. Next I layered the dark and light blue tissue, alternating the colours to make a "bed". I set the pumpkin on top, and it was ready to go!

Friday, October 22, 2010

Pumpkin Coach


I made this coach for a pumpkin carving contest. Proceeds were donated to the United Way (it cost $5 to enter the contest). I won second place. Here's how I made it.

Supplies:
  • 1 pumpkin, as round as possible
  • a pen or marker to draw on the pumpkin
  • knife and tools to clean and carve the pumpkin
  • a toy horse (this one is a Bratz Dolls horse)
  • craft paint ( blue and metallic silver)
  • paint brush
  • ribbon
  • 2 small photo frames for windows
  • craft feathers
  • hot glue gun and glue sticks
  • crystal paperweight (turned upside down)
  • spokes and wheels (I used plastic parts that are used for store displays)
  • Optional: Princess Doll
  • Optional: light source (candle, small flashlight, flameless candle, etc)

Step one: Turn the pumpkin upside down. Draw the shapes of a lid, two windows and a door. I made the door oval, but it can be any shape you like. I used the frames as guides for the shape of the window, I traced around the frame opening. When you are happy with the layout, carve out a lid and hollow out the pumpkin. Carve out the windows and door.

Step two:
Paint the pumpkin, including the lid. Acrylic craft paint works, but spray paint is faster. Multiple coats may be needed. I added some metallic silver paint along the ridges of the pumpkin as higlights.


Step three: Hot glue the feathers to the underside of the lid. Hot glue the small frames to the windows. I outlined the door with white ribbon trim and added a small scrapbooking doodad to the top of the door. The crystal I used for the top of the coach had a pointed bit on the top, so I turned it upside down and carved a little hole to sit it into. I hot glued it into place.


Step four: Make some wheels. This is the trickiest part of the whole project-how to get the pumpkin to sit on the wheels. I don't have a picture of the construction, but I made a sort of webbing with ribbon. I tied ribbons around the spokes of the wheels to form a sort of basket for the pumpkin to sit on. It took quite a bit of fiddling and trial and error to get it right. You could also use the wheels meant for toy cars- hobby stores usually have them. Empty spools of thread and wooden dowels might also work. The pieces I used are black pastic. I painted them silver, you can see from the picture the paint didn't quite stick. I then drew the spokes on the wheels with a black marker.

Step five:
Attach the horse. I used some white ribbon, and simply attached one end to the saddle that came with the toy, and the other end to the spokes of the wheels.

If I was going to make this project again, I would buy the horse first. As you can see, the scale is totally wrong. That horse is a giant! I would also buy some model car wheels that I could poke into the pumpkin itself. The ribbon contraption worked, but it required alot of fiddling and didn't look as nice as I wanted.

But all in all, it worked out quite well.


Tuesday, October 12, 2010

Autumn Inspiration


The fall leaves were impossible to miss this morning. The reds and oranges have arrived! Joining up with the yellows to create the most fabulous palette.

In honour of those leaves, check out my new board over at pinterest.com. Click here.

The best things about fall: taking sweaters and scarves out of storage, apple cider, hot chocolate, crisp air and walking through fallen leaves.